Suchergebnisse für "sparkfun OR environmental OR combo OR breakout OR ccs811 OR bme280 OR qwiic"
-
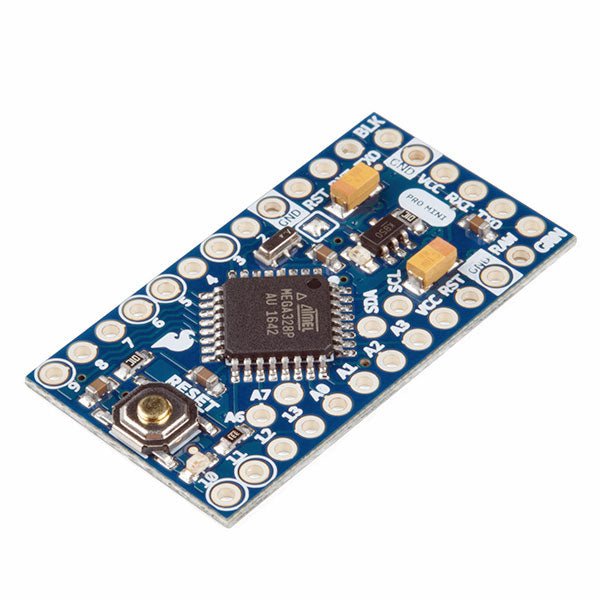
SparkFun SparkFun Arduino Pro Mini 328 (5 V, 16 MHz)
Der Arduino Pro Mini ist ein Mikrocontroller-Board auf Basis des ATmega328P. Es hat 14 digitale Eingangs-/Ausgangs-Pins (von denen 6 als PWM-Ausgänge verwendet werden können), 6 analoge Eingänge, einen On-Board-Resonator, eine Reset-Taste und Löcher für die Montage von Stiftleisten. Eine sechspolige Stiftleiste kann mit einem FTDI-Kabel oder einem SparkFun-Breakout-Board verbunden werden, um die Platine über USB mit Strom zu versorgen und mit ihr zu kommunizieren. Der Arduino Pro Mini ist für die semi-permanente Installation in Objekten oder Ausstellungen gedacht. Die Platine wird ohne vormontierte Stiftleisten geliefert, was die Verwendung verschiedener Arten von Steckern oder das direkte Anlöten von Drähten ermöglicht. Das Pin-Layout ist mit dem Arduino Mini kompatibel. Technische Daten Microcontroller ATmega328P Board Stromversorgung 5-12 V Schaltung Betriebsspannung 5 V Digitale E/A-Pins 14 PWM Pins 6 UART 1 SPI 1 I²C 1 Analogeingangs-Pins 6 Externe Interrupts 2 DC-Strom pro I/O-Pin 40 mA Flash Memory 32 KB, davon 2 KB vom Bootloader verwendet SRAM 2 KB EEPROM 1 KB Taktgeschwindigkeit 16 MHz Abmessungen 18 x 33.3 mm Downloads Eagle files Schematics
€ 14,95€ 7,95
Bestpreis
-

Seeed Studio Seeed Studio RF Explorer 3G Combo Spectrum Analyzer
You can use RF Explorer 3G Combo equally well outdoor and indoor, and you can also connect it to a PC for extra functionality using standard mini-USB 2.0 connector. This model includes a WSUB1G baseline unit plus an RFEMWSUB3G Expansion Module conveniently assembled and tested. It comes with two SMA connectors and two antennas,a dual band telescopic 144 / 430 MHz antenna for all Sub-GHz frequencies and a whip helical antenna for 2.4 GHz band. Additional, specific band antennas may be needed to cover efficiently some of the frequencies supported. The combination of these two models offer the wide band coverage of the WSUB3G module, together with the highest sensitivity and quick response of the WSUB1G model for the popular sub-1GHz frequencies. Features Pocket size and light weight Solid aluminum metal case Includes a transport EVA carry case for RF Explorer Spectrum Analyzer mode with Peak Max and Hold, Normal, Overwrite and Averaging modes Lifetime free firmware upgrades available, open to community requested features High capacity Lipo for 16 hours+ of continuous run, rechargeable by USB Windows PC client Open Source Can be extended with internal Expansion Modules for additional band and functionality Wide band coverage to all popular RF frequencies, starting at 15 MHz and going up to 2.7 GHz. This includes very interesting frequency areas such as 2 m HAM radio, all VHF and UHF, FM radio, GPS, WiFi and WiMax, Bluetooth, etc. Firmware: RF Explorer 3G Combo is delivered with upgraded firmware v1.09. Note some of the features and operation accuracy will be improved in upcoming free firmware revisions. Specifications Battery Lithium Cells / Batteries contained in equipment UN3481 - PI967 Frequency band 15-2700 MHz Frequency span 112 KHz - 600 MHz Graphics LCD 128 x 64 pixels, great visibility outdoors PC Windows client supports Windows XP/Vista/Win7 both 32 and 64bits Backlight for great indoor visibility 2 standard SMA 50 ohms connector, one for Sub-GHz wideband Nagoya NA-773 telescopic antenna included and another 2.4 GHz one for 15-2700 MHz band with helical antenna included. Amplitude resolution 0.5 dBm Dynamic range Left SMA port (WSUB1G) -115 dBm to 0 dBm Right SMA port (WSUB3G) -110 dBm to -10 dBm Absolute Max input power Left SMA port (WSUB1G) +5 dBm Right SMA port (WSUB3G) +30 dBm Average noise level (typical) -110 dBm Frequency stability and accuracy (typical) +-10 ppm Amplitude stability and accuracy (typical) +-6 dBm Frequency resolution 1 KHz Resolution bandwidth (RBW) automatic 3 KHz to 600 KHz Weight 185 g Size 113 x 70 x 25 mm Included RF Explorer 3G Combo Nagoya NA-773 wideband telescopic antenna 2.4 GHz band antenna EVA Case Documentation For more info and to get started with your RF Explorer, visit the start page. For questions and support, please visit https://support.rf-explorer.com
€ 275,32
-

Elektor Digital Elektor 03-04/2021 (PDF)
MIT INGENIEURSGEIST - AUS DER EU UND DEN USA DIE VISION UND TECHNIK HINTER SPARKFUN ERSTE SCHRITTE MIT MICROMOD MEIN GETUNTER SPARKFUN-JETBOTWie ich meinen von einem Jetson Nano von NVIDIA gesteuerten JetBot aufgebohrt habe PROGRAMMIERUNG EINES FPGAS WIE MAN EINE GNSS-REFERENZSTATION BAUT CLOCKCLOCK: ZEIT-ANZEIGE DER BESONDEREN ART UNTER DER LUPE: SPARKFUN INVENTOR'S KIT GLENN SAMALA VON SPARKFUN ÜBER PRODUKTENTWICKLUNG UND NEUE PROJEKTE EIGENE BOARDS ENTWICKELN MIT SPARKFUNS À LA CARTE ENTWERFEN MIT DEM SPARKFUN-ARTEMIS ERSTE SCHRITTE MIT DEM QWIIC-ÖKOSYSTEM FÜR SCHNELLES PROTOTYPING POSTER - QWIIC UNTER DER LUPE: DAS DIY-LIPO-SUPERCHARGER-KIT VON GREATSCOTT! UND ELEKTOR UNVERGESSLICHE ELEKTRONIK AUS DER GESCHICHTE VON SPARKFUN PERFEKTES EINPARKEN MIT LIDAR EIN HANDGEMACHTES BURIED PAD VOM ENTWURF ZUM VERKAUF: DER SPARKFUN-RTK-SURVEYOR „HELLO WORLD“ VOM RASPBERRY PI PICO UND RP2040Ein Blick auf den ersten Mikrocontroller der Raspberry Pi Foundation VIERBEINIGER ROBOTER SELBSTGEBAUT POSTER - MICROMOD RISC-V-IOT-ENTWICKLUNG MIT FREERTOS-BIBLIOTHEKEN FÜR AWS ELEKTRONIK MACHT SPASSEin Gespräch unter Elektronik-Enthusiasten HEXADOKUSudoku für Elektroniker
€ 11,90
-

Elektor Publishing The BeagleY-AI Handbook
A Practical Guide to AI, Python, and Hardware Projects Welcome to your BeagleY-AI journey! This compact, powerful, and affordable single-board computer is perfect for developers and hobbyists. With its dedicated 4 TOPS AI co-processor and a 1.4 GHz Quad-core Cortex-A53 CPU, the BeagleY-AI is equipped to handle both AI applications and real-time I/O tasks. Powered by the Texas Instruments AM67A processor, it offers DSPs, a 3D graphics unit, and video accelerators. Inside this handbook, you‘ll find over 50 hands-on projects that cover a wide range of topics—from basic circuits with LEDs and sensors to an AI-driven project. Each project is written in Python 3 and includes detailed explanations and full program listings to guide you. Whether you‘re a beginner or more advanced, you can follow these projects as they are or modify them to fit your own creative ideas. Here’s a glimpse of some exciting projects included in this handbook: Morse Code Exerciser with LED or BuzzerType a message and watch it come to life as an LED or buzzer translates your text into Morse code. Ultrasonic Distance MeasurementUse an ultrasonic sensor to measure distances and display the result in real time. Environmental Data Display & VisualizationCollect temperature, pressure, and humidity readings from the BME280 sensor, and display or plot them on a graphical interface. SPI – Voltmeter with ADCLearn how to measure voltage using an external ADC and display the results on your BeagleY-AI. GPS Coordinates DisplayTrack your location with a GPS module and view geographic coordinates on your screen. BeagleY-AI and Raspberry Pi 4 CommunicationDiscover how to make your BeagleY-AI and Raspberry Pi communicate over a serial link and exchange data. AI-Driven Object Detection with TensorFlow LiteSet up and run an object detection model using TensorFlow Lite on the BeagleY-AI platform, with complete hardware and software details provided.
€ 44,95
Mitglieder: € 40,46
-

Elektor Digital The BeagleY-AI Handbook (E-book)
A Practical Guide to AI, Python, and Hardware Projects Welcome to your BeagleY-AI journey! This compact, powerful, and affordable single-board computer is perfect for developers and hobbyists. With its dedicated 4 TOPS AI co-processor and a 1.4 GHz Quad-core Cortex-A53 CPU, the BeagleY-AI is equipped to handle both AI applications and real-time I/O tasks. Powered by the Texas Instruments AM67A processor, it offers DSPs, a 3D graphics unit, and video accelerators. Inside this handbook, you‘ll find over 50 hands-on projects that cover a wide range of topics—from basic circuits with LEDs and sensors to an AI-driven project. Each project is written in Python 3 and includes detailed explanations and full program listings to guide you. Whether you‘re a beginner or more advanced, you can follow these projects as they are or modify them to fit your own creative ideas. Here’s a glimpse of some exciting projects included in this handbook: Morse Code Exerciser with LED or BuzzerType a message and watch it come to life as an LED or buzzer translates your text into Morse code. Ultrasonic Distance MeasurementUse an ultrasonic sensor to measure distances and display the result in real time. Environmental Data Display & VisualizationCollect temperature, pressure, and humidity readings from the BME280 sensor, and display or plot them on a graphical interface. SPI – Voltmeter with ADCLearn how to measure voltage using an external ADC and display the results on your BeagleY-AI. GPS Coordinates DisplayTrack your location with a GPS module and view geographic coordinates on your screen. BeagleY-AI and Raspberry Pi 4 CommunicationDiscover how to make your BeagleY-AI and Raspberry Pi communicate over a serial link and exchange data. AI-Driven Object Detection with TensorFlow LiteSet up and run an object detection model using TensorFlow Lite on the BeagleY-AI platform, with complete hardware and software details provided.
€ 34,95
Mitglieder: € 27,96
-
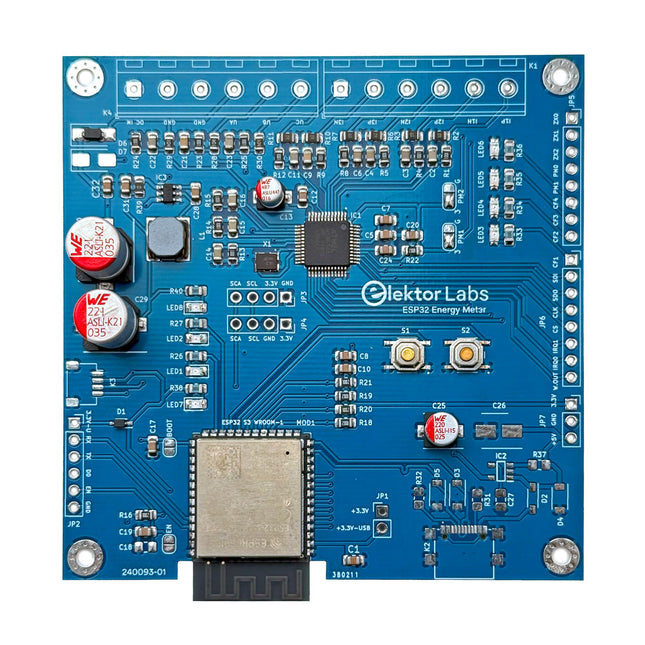
Elektor Labs Elektor ESP32-Energiemessgerät
Das Elektor ESP32-Energiemessgerät wurde für die Echtzeit-Energieüberwachung und die Smart Home-Integration entwickelt. Angetrieben durch den ESP32-S3 Mikrocontroller bietet es robuste Leistung mit modularen und skalierbaren Funktionen. Das Gerät verwendet einen 110/230 VAC auf 12 VAC Abwärtstransformator zur Spannungsabtastung, der eine galvanische Trennung und Sicherheit gewährleistet. Sein kompaktes Platinenlayout umfasst Schraubklemmenblöcke für sichere Verbindungen, einen Qwiic-Anschluss für zusätzliche Sensoren und einen Programmier-Header für die direkte ESP32-S3-Konfiguration. Der Energiezähler ist mit einphasigen und dreiphasigen Systemen kompatibel und somit für verschiedene Anwendungen anpassbar. Das Energiemessgerät ist einfach einzurichten und lässt sich in Home Assistant integrieren. Er bietet Echtzeitüberwachung, Verlaufsanalysen und Automatisierungsfunktionen. Es liefert genaue Messungen von Spannung, Strom und Leistung und ist damit ein wertvolles Werkzeug für das Energiemanagement in Haushalten und Unternehmen. Features Umfassende Energieüberwachung: Erhalten Sie detaillierte Einblicke in Ihren Energieverbrauch für eine intelligentere Verwaltung. Anpassbare Software: Passen Sie die Funktionalität an Ihre Bedürfnisse an, indem Sie eigene Sensoren programmieren und integrieren. Smart Home Ready: Kompatibel mit ESPHome, Home Assistant und MQTT für vollständige Smart Home-Integration. Sicher & Flexibles Design: Funktioniert mit einem 110/230 VAC auf 12 VAC Abwärtstransformator und verfügt über eine vormontierte SMD-Platine. Schnellstart: Enthält einen Stromwandlersensor und Zugang zu kostenlosen Einrichtungsressourcen. Technische Daten Mikrocontroller ESP32-S3-WROOM-1-N8R2 Energiemess-IC ATM90E32AS Statusanzeigen 4x LEDs zur Anzeige des Stromverbrauchs2x programmierbare LEDs für benutzerdefinierte Statusbenachrichtigungen Benutzereingabe 2x Drucktasten zur Benutzersteuerung Ausgabe anzeigen I²C-OLED-Display zur Echtzeit-Anzeige des Stromverbrauchs Eingangsspannung 12~16 VAC (über einen Abwärtstransformator von 110/230 VAC auf 12 VAC) Klemmstromsensor YHDC SCT013-000 (100 A/50 mA) im Lieferumfang enthalten Smart Home-Integration ESPHome, Home Assistant und MQTT für nahtlose Konnektivität Konnektivität Header für die Programmierung, Qwiic für Sensorerweiterung Anwendungen Unterstützt einphasige und dreiphasige Energieüberwachungssysteme Abmessungen 79,5 x 79,5 mm Lieferumfang 1x Teilbestückte Platine (SMD-Bauteile sind vormontiert) 2x Schraubklemmenblock-Anschlüsse (nicht montiert) 1x YHDC SCT013-000 Stromwandler Erforderlich Netztransformator nicht enthalten Downloads Datasheet (ESP32-S3-WROOM-1) Datasheet (ATM90E32AS) Datasheet (SCT013-000) Frequently Asked Questions (FAQ) Vom Prototyp zum fertigen Produkt Was als innovatives Projekt zur Entwicklung eines zuverlässigen und benutzerfreundlichen Energiemessgeräts mithilfe des ESP32-S3-Mikrocontrollers begann, hat sich zu einem robusten Produkt entwickelt. Ursprünglich als Open-Source-Projekt entwickelt, zielte das Gerät darauf ab, eine präzise Energieüberwachung, Smart-Home-Integration und mehr zu ermöglichen. Durch sorgfältige Hardware- und Firmware-Entwicklung ist das Energiemessgerät heute eine kompakte, vielseitige Lösung für das Energiemanagement.
€ 79,95€ 64,95
Bestpreis
-

Elektor Digital Elektor 07-08/2021 (PDF)
KOCHSHOW À LA ELEKTOR LORA MIT DEM RASPBERRY PI PICOViel Spaß mit MicroPython! WAS IST RISC-V?Warum die Industrie einen neuen Prozessorkern so spannend findet 60 JAHRE ELEKTORSommer-Projekte VIELSEITIGE SPANNUNGSVERSORGUNG FÜR BREADBOARDSPositive und negative 5-V-Ausgangsspannungen von USB RASPBERRY PI PICO ESSENTIALSEin Beispiel-Kapitel: WLAN mit dem Raspberry Pi Pico MAGNETISCHE LEVITATION AUF DIE EINFACHE ART PARALLAX PROPELLER 2Teil 3: Smart Pins und serielle Daten (UART) NUCLEO-BOARDS PROGRAMMIEREN MIT DER STM32CUBE-IDEEin Beispiel-Kapitel: FreeRTOS für die STM32 MCU VON ENTWICKLERN FÜR ENTWICKLERTipps & Tricks, Best Practice und andere nützliche Infos DIGITALE PINZETTE MINIWARE DT71 WEARABLE-WLAN GADGETESPHome wieder im Einsatz! ALLER ANFANG …muss nicht schwer sein! EINFACHE SKETCHES MIT DEM QWIIC-ÖKOSYSTEM JAVA AUF DEM RASPBERRY PITeil 2: Steuerung von GPIOs mit einem Spring-REST-Service RASPBERRY PI COMPUTE MODULE 4Ein Raspberry Pi für die Industrie PORTABLES AUTONOMES FEINSTAUBMESSGERÄT FÜR 2,5-ΜM-PARTIKELBehalten Sie Ihre Gesundheit im Auge AUS DER LEBEN GEGRIFFENDie Zukunft war in der Vergangenheit besser MICROPYTHON FÜR DEN ESP32 UND CO.Teil 1: Installation und erste Programme LADUNGSGEKOPPELTE BAUTEILE IN OSZILLOSKOPENBemerkenswerte Bauteile ESD – DER UNSICHTBARE BLITZZerfetzt Halbleiter wie ein Blitz einen Baum SOLARANLAGE FÜR MÄHROBOTERÖkologisch - preiswert - einfach! EUROPAS BEMÜHUNGEN, BIG TECH ZU ZÄHMEN HEXADOKUThe Original Elektorized Sudoku
€ 11,90
-
Elektor Digital Elektor 07-08/2024 (PDF)
Diese Ausgabe steht allen GOLD- und GREEN-Mitgliedern auf der ElektorMagazine-Website zum Download bereit! Sie sind noch kein Mitglied? Hier klicken! Kleine WärmebildkameraRealisiert mit einem Arduino UNO Projekt-Update #3: Energiemessgerät mit ESP32Integration und Test mit Home Assistant 2024: Eine Odyssee in die KIVerbessern der Objekterkennung: Nutzung verfeinerter Techniken Raspberry Pi Goes KINeues Kit enthält M.2-HAT mit KI-Beschleuniger Sensoren für WetterstationenWelchen Sensor sollte man wählen? KI-gestützter WasserzählerTeil 1: Bringen Sie Ihren alten Zähler ins IoT! Ein GSM-AlarmNutzung der GSM-Technologie für die Fernüberwachung von Garagen Low-Power-Thread-Geräte optimiert und getestetNiedriger Energiebedarf ... Niedrige Leistung? Aus dem Leben gegriffenDer Gender-Gap Nebelkammer selbstgebautUnsichtbare Strahlung sichtbar machen SparkFun Thing Plus MatterEin vielseitiges Matter-basiertes IoT-Entwicklungsboard IoT-RetrofittingRS232-Geräte fit für Industrie 4.0 machen IoT mit 8-Bit-Mikrocontrollern Technologie als Motor der NachhaltigkeitNeuerungen führen zu Energieeffizienz in vielen Applikationen AWS für Arduino und Co.Teil 1: AWS-IoT-ExpressLink in der Praxis Luftstromdetektor (nur) mit ArduinoKeine externen Sensoren erforderlich! WasserleckdetektorVerbunden mit der Arduino-Cloud QuarzeBemerkenswerte Bauteile Universeller Garten-LoggerEin Schritt auf dem Weg zur KI-gestützten Gartenarbeit Analoger 1-kHz-GeneratorSinuswellen mit geringen Verzerrungen Miletus: Web-Apps offline nutzenSystem- und Gerätezugriff inklusive Von 4G zu 5GIst es wirklich so einfach? Aller Anfang...muss nicht schwer sein: Der Ausgleich
€ 11,90
-
Elektor Digital Elektor AI Guest Edition 2024 (PDF)
Diese Ausgabe steht allen GOLD- und GREEN-Mitgliedern auf der ElektorMagazine-Website zum Download bereit! Sie sind noch kein Mitglied? Hier klicken! KI-Sicherheitssystem AlertAlfredMit einem Raspberry Pi 5 plus Hailo-8L-Modul KI in der ElektronikentwicklungEin Update nach nur einem Jahr Einführung in KI-AlgorithmenPrompt: Welche Algorithmen werden in KI-Tools verwendet? Einplatinencomputer für KI-ProjekteÜberblick und Hintergründiges Von Sensordaten zu Modellen des Machine LearningGestenerkennung mit einem Beschleunigungssensor und Edge Impulse Bau eines undichten, integrierenden und Feuer spuckenden NeuronsKünstliche Intelligenz ohne Software ChatGPT für den ElektronikentwurfMacht GPT-4o es besser? KI at the Edge mit dem ESP32-P4 Sprachfunktionen auf dem Raspberry Pi ZeroWenn Übertaktung Sprachanwendungen ermöglicht Die wachsende Rolle von Edge-KIEin Trend, der die Zukunft prägt Die Macht der Edge-KI entfesselnEin Gespräch mit François de Rochebouët von STMicroelectronics Eine VHDL-Uhr, entwickelt mit ChatGPT Die wahren Auswirkungen der KISayash Kapoor über „KI-Schlangenöl“ und mehr Das Neueste von BeagleBoardBeagleY-AI, BeagleV-Fire, BeagleMod, BeaglePlay und BeagleConnect Freedom Moskito-Erkennung mit offenen Daten und Arduino Nicla Vision KI heute und morgenEinblicke von Espressif, Arduino und SparkFun Zeitleiste: Künstliche Intelligenz BeagleY-AIDer neuste Einplatinencomputer für KI-Anwendungen KI im FokusPerspektiven aus der Elektor-Community Maschinelles Sehen mit OpenMVBau eines Limonadendosen-Detektors Ein Gespräch mit dem digitalen VerstandChatGPT vs. Gemini Skilling Me Softly with this Bot?Scheitert die KI-Revolution im elektronischen Bereich an mangelnder sozialer Präzision?
€ 11,90


-
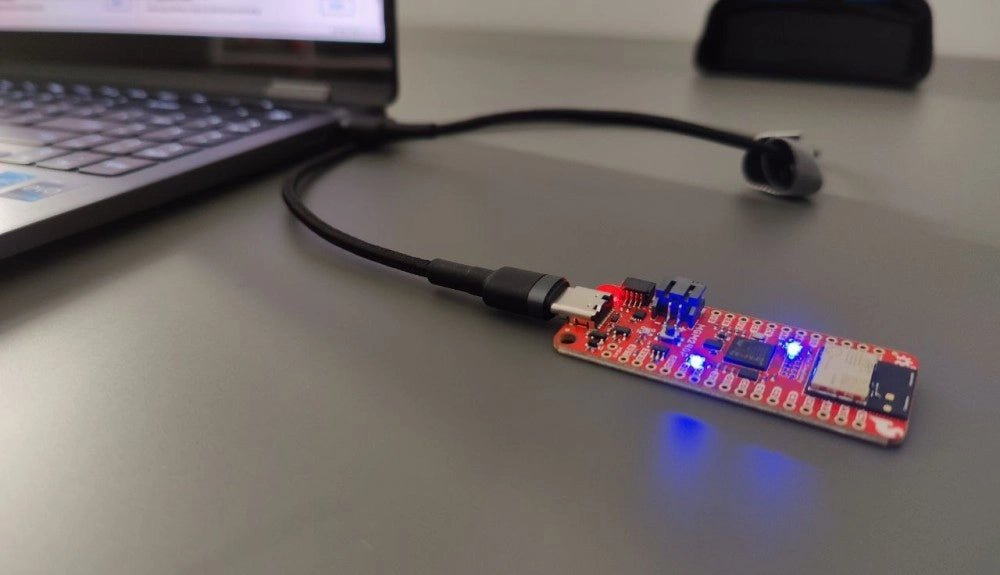
, von Saad Imtiaz SparkFun Thing Plus Matter (MGM240P): Ein vielseitiges IoT-Entwicklungsboard basierend auf Matter (Testbericht)
Das SparkFun Thing Plus Matter - MGM240P ist ein vielseitiges und funktionsreiches Entwicklungsboard für die Erstellung von Matter-basierten IoT-Geräten. Matter, früher bekannt als Project CHIP...
-

, von Clemens Valens Zwei neue Arduino UNO R4 Boards: Minima und Wi-Fi
Der leistungsstarke Arduino UNO R4 ist das neueste Mitglied der kultigen Arduino UNO Familie. Es gibt ihn sogar in zwei Versionen. Werfen wir einen Blick...
-

, von Clemens Valens Arduino Alvik, ein Wendepunkt in der STE(A)M-Ausbildung? (Review)
Eine Möglichkeit, die Ingenieure von morgen zu finden und hervorzubringen, besteht darin, unter unseren Kindern zu suchen. Die Idee besteht darin, ihnen unterhaltsame und einfach...


